Paccheri, Saving Cats, and the Welcome Return of Low-Rise Pants

Last Sunday’s dinner. My entire life is dedicated to working a job to pay the bills, cooking, and worrying about cats… whether my own, or local strays.

If you came here for the recipe, scroll down…. because I’ve got a lot to say that isn’t about pasta.

I feel like it’s the Fall of 2011 again, because I am currently obsessed with looking after a couple of homeless cats in need, and the thought of saving them is currently consuming almost every waking thought. I don’t know why I get so obsessed with these things from time to time.

It’s literally like the year that Bijou, his sister, “Pot Pie,” and his mother showed up in my parent’s backyard when I was living at home after college, and my entire life’s focus and goal became saving those cats. After we were able to live-trap them and get them spayed/neutered, I built a shelter from scratch using a large, dog kennel, tarps, and my own, down coat. This shelter not-so-lovingly was soon referred to as “tent city”, and my dad, mom, and sister were all pretty appalled by the situation happening in the backyard, since my homemade shelter stuck out like a sore thumb when you looked out the living room sliding door. I must admit, it was pretty trashy looking, but it was functional and kept the cats warm and dry.

I remember coming home from work and checking on the cats to make sure they were all accounted for and using the shelter and had been fed. The only thing I would look forward to after each and every miserable shift at Hollister in Binghamton, was coming home to check on and take care of those cats. I even bought a fucking electric blanket that I made my parent’s keep plugged in on the front porch all winter long, and I turned the Adirondack chair into a secondary shelter for them – covered in blankets and sheepskins, with the electric blanket underneath.

I literally cannot stand to see or be aware of an animal in need or distress. I don’t give a fuck about most humans – judge me however you want. Unless a human is a baby or a child in a fucked up situation, they can ask for help and they have unlimited resources to get help. Animals are defenseless and at the mercy of humans who either are kind enough to help them out, or ignore them and let them suffer.

I am imploring anyone who is reading this right now, to ask around and see if anyone you know would like to take in a street cat as a pet, or knows someone who can help get them homed. I’ve reached out to several local organizations, but most of them are TNR (trap/neuter/release). They all seemed happy to hear the cats were spayed and had a regular feeder, but told me in order to have them fostered out, we will first need to know if the cats are friendly.

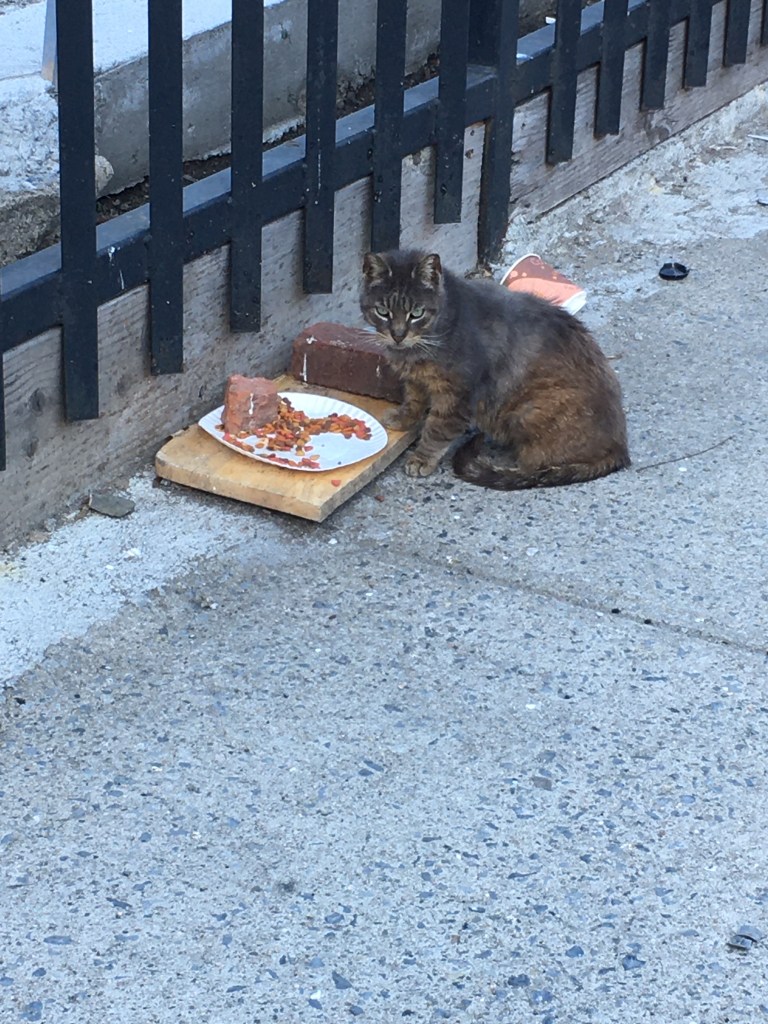
I met the cats’ feeder, an older lady, who “claims” that she feeds them twice daily. I have reason to believe her claim is bullshit though, since I now make the effort to walk by the parking lot where the cats live, twice-daily, to check on them. I also bring food and fresh water to feed them if I don’t see evidence that they’ve already been fed. At least I know the cats are both spayed, which she also told me, since they have the telltale clipped ears.

I left laminated notices on the the community garden next to the parking lot where the cats live, to see if the people gardening there would be ok with me placing a shelter for the cats in the garden. The garden is really shitty and adorned with crappy plastic lawn ornaments, etc., so I don’t know why they’d be opposed to me placing an nice, cottage-style cat lodge there. No one has responded to my post yet though, and I am getting more and more disturbed.

I will literally go on a fucking hunger strike if I need to, in order to get these cats the help they need. I am willing to throw down $200 of my own money to buy shelters, but I can’t just buy shelters and place them behind a gated garden without someone a) letting me into the gate, and b) ensuring they will not be thrown out.

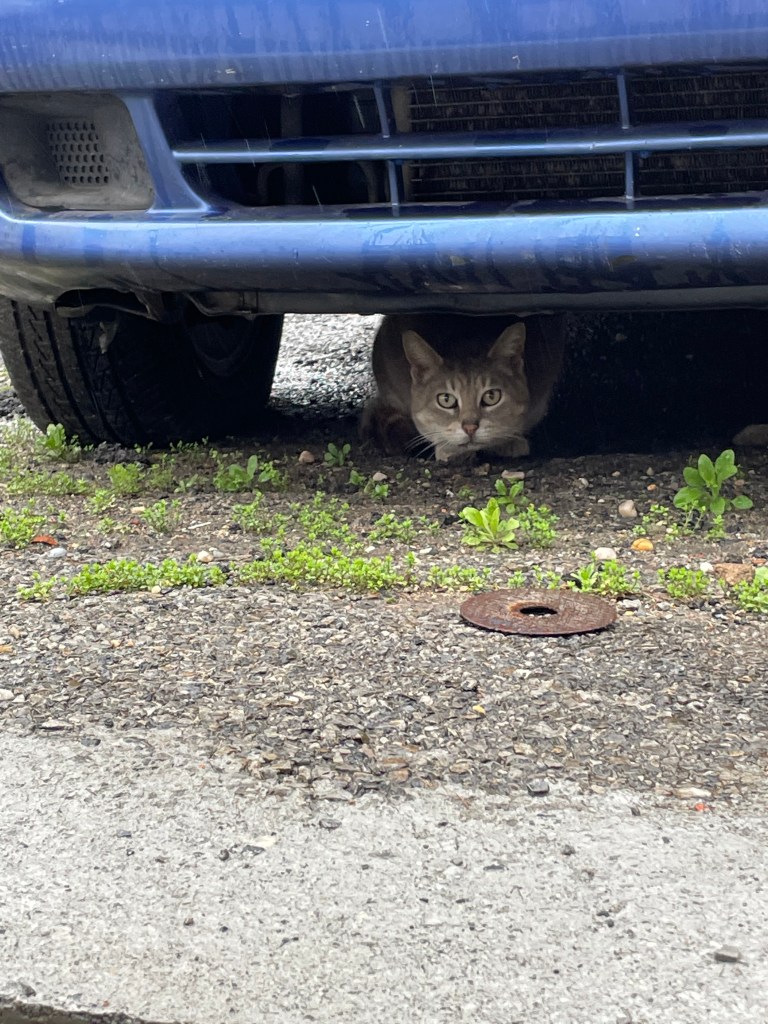
Today, I saw the older, mangier looking cat sleeping on a discarded pillow that made its way under the front of a truck parked in the parking lot… it fucking broke my heart. I cannot let these cats go on living this way, when my own two, spoiled cats are fat, happy, warm, healthy and loved. I would take the cat in myself, but I have a one bedroom apartment and two male cats, so bringing in a third just isn’t going to work.

This is the cat I worry about the most – she is much older and unhealthier looking than the second one who lives here
This is the younger, healthier looking cat. She seems much more skittish and has not let me pet her.

Anyhow, enough about the cats. I will find a way to help them, whether it’s a shelter or helping them to be vetted and fostered out.

It was a rainy walk home to Brooklyn from Manhattan last Sunday.

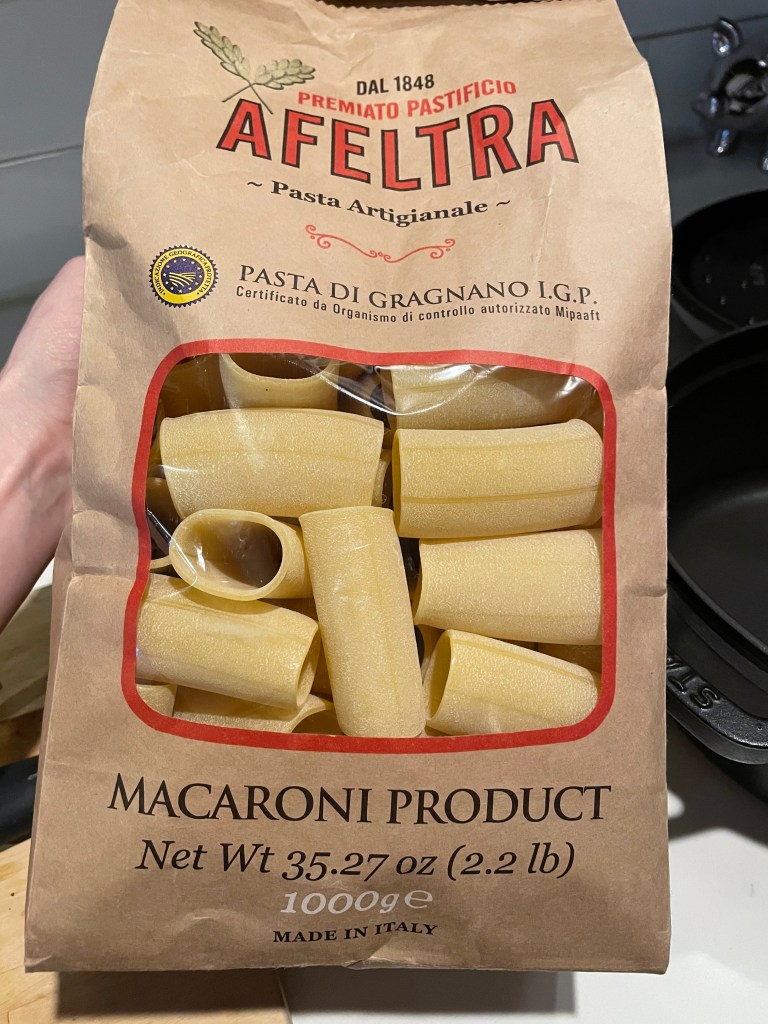
Last Sunday, I was doing my usual walk home from Elsie Rooftop back to Brooklyn, when I was suddenly inspired to stop by Eataly and spend money I shouldn’t be spending on overpriced pasta.

The night before, I was scrolling through the ‘gram and saw an upright, tubular pasta dish that this Italian food blogger/cook I follow on Instagram had posted, and I felt the urge to make something similar. And so, in the pouring rain, I stopped by Eataly Flatiron for the key ingredients – a large, tubular pasta that could be stuffed and baked in an upright position, and a good quality ricotta. I was pleasantly surprised to find Eataly was not as busy as usual (I guess because of the rain), so I had time to meander the aisles and find the perfect ingredients without feeling stressed.

I have probably said this before, but I wish I could live in Eataly. I miss sitting at the wine bar though, which is still closed do to the COVID bar restrictions
I purchased this large bag of paccheri for $11. Because each noodle is so large, a little bit goes a long way. You only need about 6-7 noodles per serving, so I will be able to create two more dishes with this same bag.
I found a smoked ricotta in the cheese section, which I have never tried before, and couldn’t resist.

Have I ever mentioned I hating out these recipes from my head, and that’s why I don’t do it as often as I should? LOL. I know this was supposed to be food and recipe blog… I love cooking, but man do I hate taking the time to type out the recipe.

The Morning Star brand sausage patties are my favorite fake-sausage alternative for when you need crumbled sausage

INGREDIENTS:

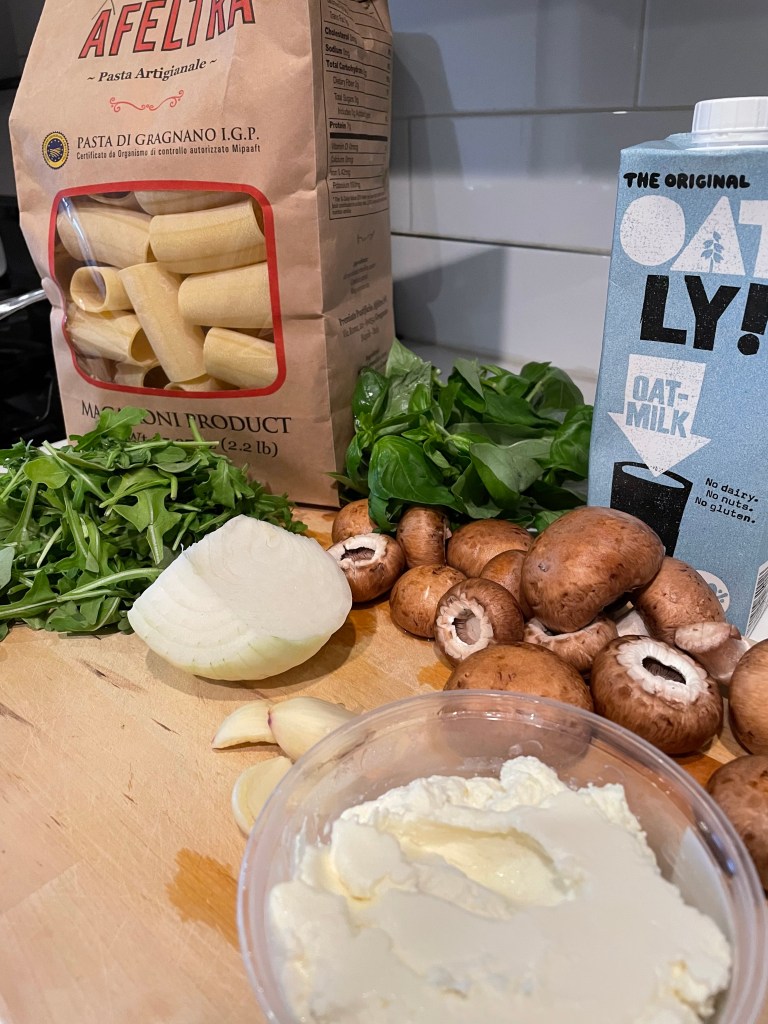
  1. Large, tubular pasta (paccheri or cannelloni work best)
  2. 1/3 cup good quality ricotta (or smoked ricotta)
  3. 1/2 pound ground sausage (or meatless sausage)
  4. 2 cups fresh spinach or arugula
  5. Container of Mushrooms (baby bella), coarsely chopped
  6. 1/2 medium sized white or yellow onion, finely chopped
  7. 1/3 cup olive oil
  8. 2 Tbs. butter (or butter substitute)
  9. 2 Tbs. flour
  10. 1/2 cup finely grated Parmigiano-Reggiano
  11. 2 cups Whole milk (or milk substitute – I used oat milk)
  12. 1 tsp. granulated garlic
  13. 2 tsp. dried oregano
  14. salt and pepper to taste
  15. pinch of nutmeg
  16. coarsely chopped fresh basil or parsley

DIRECTIONS:

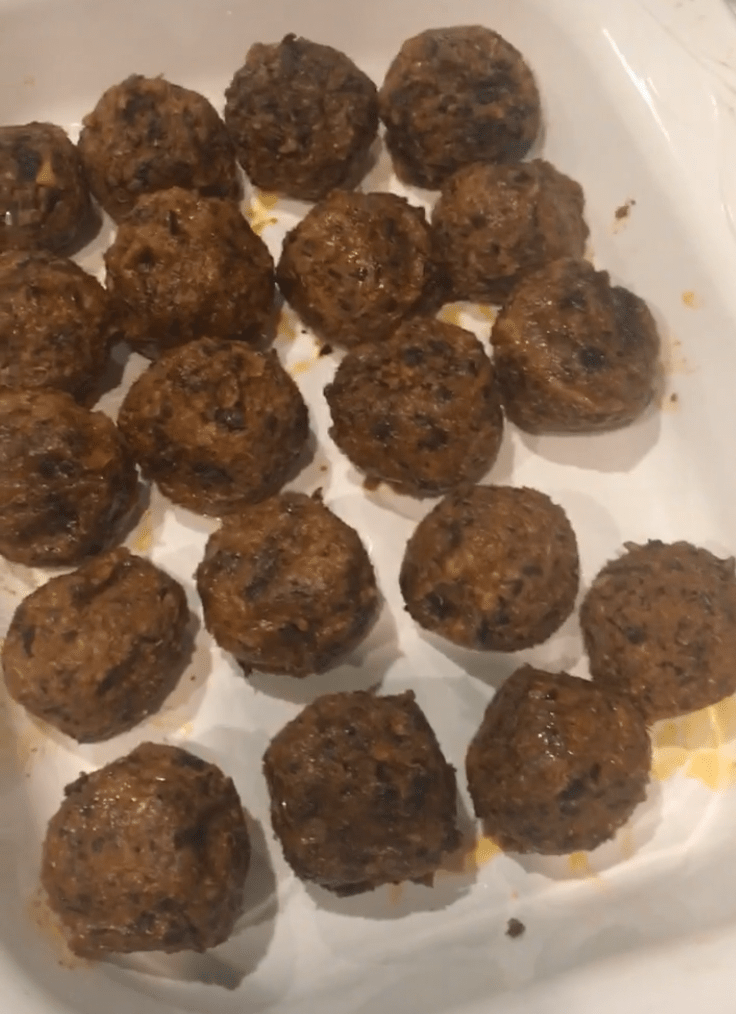
  • If using the recommended Morning Star Sausage, cook for 1.5 minutes in microwave, then roughly chop into crumbles and set aside
  • Heat about 3 tablespoons of olive oil over low heat in a large saucepan, and add in the minced onions. Stir occasionally until translucent.
  • Add in the chopped mushrooms, and cook over low heat, stirring occasionally, until soft (8-10 minutes).
  • Add in a 2 Tbs. of butter and let melt
  • Add in 2 Tbs. of flour, to form a roux
Pictured here: the onions and mushrooms in the roux (butter + flour)
  • Gradually add in milk or milk substitute, increasing the heat to medium.
  • Stir continuously, and add in the grated parm and the seasonings (it should go without saying, but taste your sauce to see what it needs more of)
Add the milk slowly, as you want the sauce to be the right consistency – it will get thicker after the cheese is added in as well
  • Once the sauce seems to be the proper consistency, stir in your sausage crumbles (or, if using real sausage, your ground meat), as well as the fresh arugula or spinach
  • Continue to stir over low heat until spinach/arugula is cooked and meat is cooked through (if you are using real sausage)
The finished sauce
  • Bring a pot of heavily salted water to a boil, and once boiling, cook the pasta to the al dente specifications on the the bag or box
  • Once the pasta is cooked, drain, rinse with cold water, and set aside
  • Heat oven to 350, and butter a casserole dish or dutch oven
  • Using a ladle, cover the bottom of the casserole dish in a layer of sauce… this will be the glue into which you’ll be able to stand the cooked noodles upright
  • Arrange the pasta noodles standing up
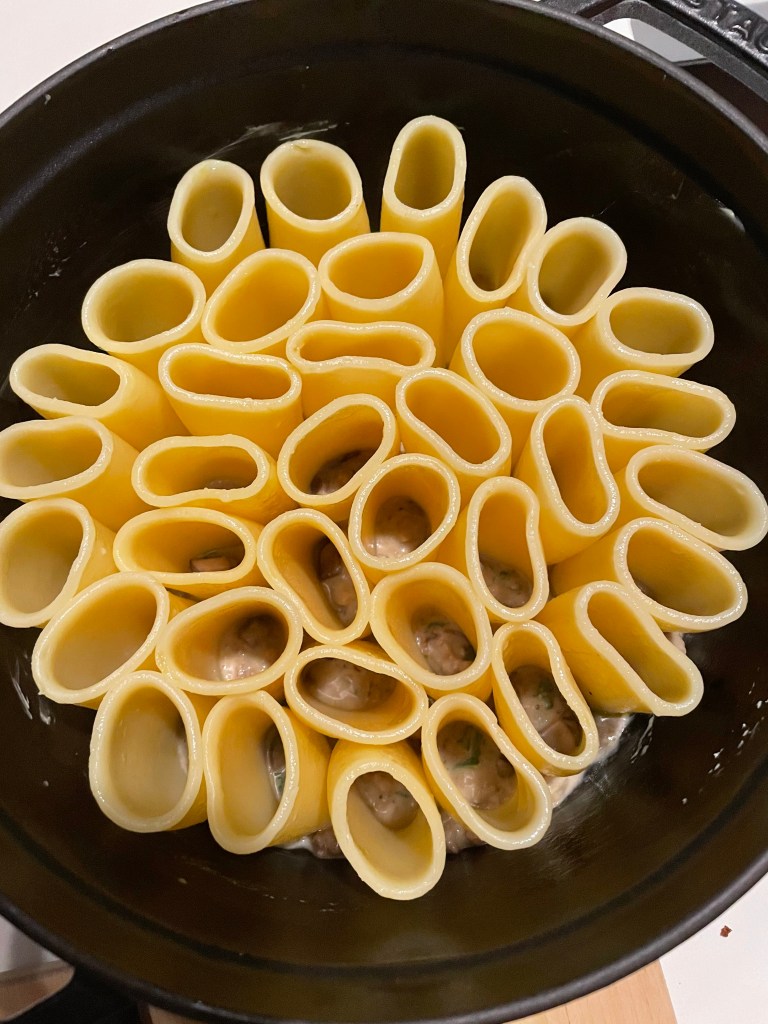
  • Once the noodles are organized and covering the floor of the dish, use a pastry bag, large ziplock, or a small teaspoon to fill the noodles with the sauce mixture
  • Bake uncovered for 25 – 30 minutes
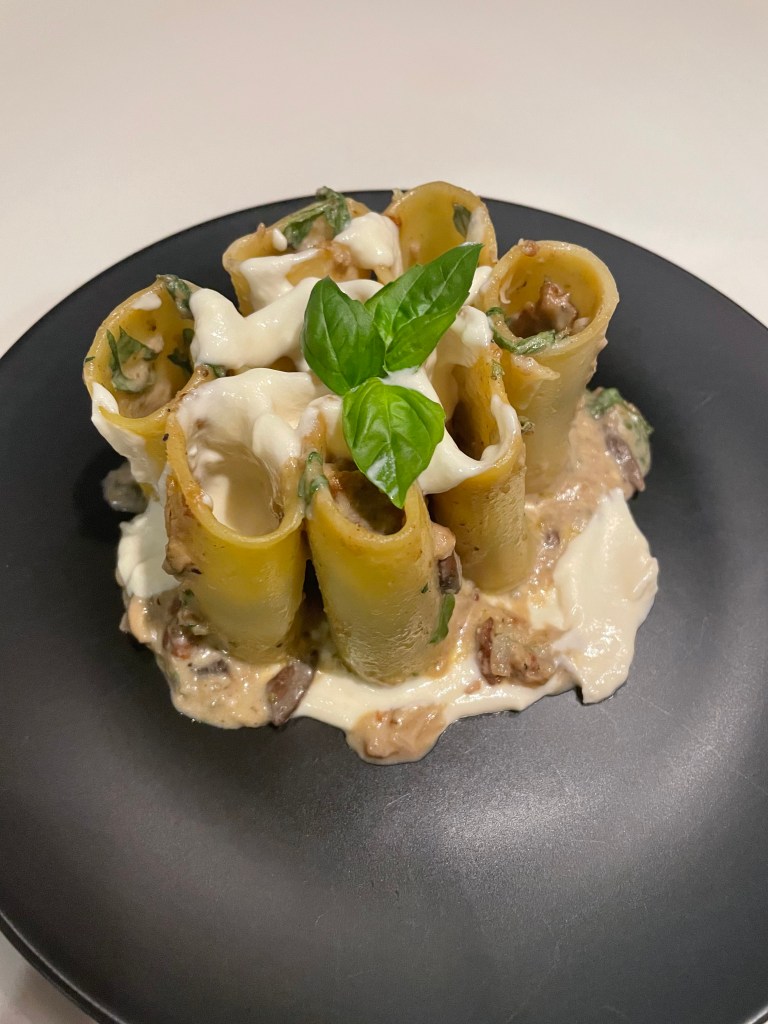
  • Plate noodles standing in upright position, and top with ricotta and fresh basil or parsley
Voila!

The whole time I just spent typing up this recipe, I was thinking of those cats… I’m telling you, I won’t rest until something has been done and I know they have a home or at least a safe shelter. I can’t sleep or relax knowing they are three streets down without a soft and warm place to sleep.

Found these Free People jeans on Poshmark for $30

In other news, I probably should stop buying things I don’t need from Poshmark. I mean I found these awesome bell bottoms, but I also bought some heart shaped sunglasses I probably don’t need and might never get a chance to wear.

Time to go cook tonight’s dinner and brainstorm ways to save those cats. I might just go hang out around the community garden tomorrow and see if I can find a person to talk to about putting a shelter there.

Cheers fam.

Butternut Squash: Thai Curry Style

IMG_3388
Thai-style red curry, with butternut squash used as the base… recipe to follow below

It’s Thursday night, which means I’ve just about reached my peak, maximum exhaustion level for the week (actually, the real pinnacle is usually Friday night after work… that’s when I really crash and burn…).  I used to hear my mom say it, but Goddamn…. “there just aren’t enough hours in the day.” Seriously.  I never even give myself enough time to unwind, exercise, sleep more than 6 hours a night, or even write this shitty blog, and I STILL don’t have enough time to do everything I want to do in a day (cleaning, exercising, writing, etc.). Work and chores and errands and taking care of the apartment, my cats, and everyone-but-myself seems to never end, and this is life without human children!  I think I’ve been living in a state of perpetual exhaustion for the past three years, and it shows.  I really need to start taking better care of myself, because these bags under my eyes are not cool.  I’ve said this before and I’ll say it again, I feel like working a 9-5 office job has aged me way more than the irregular hours and sleep schedule I kept as a server or working retail ever did.  At least then I seemed to be getting 7-8 hours of sleep each night.

Thank god tomorrow is Friday so I can sleep in the following day.  I’ve turned into a drone who lives for the weekend… FML. Work was absolutely brutal last week – I was doing like 10 hour days and coming in early so I could avoid staying late each night, but that also means working through my lunch breaks instead of getting out for a walk and some fresh air.  I fucking HATE sitting at a desk all day and not having time to walk or exercise.  I feel like such shit about myself and my body when I am not moving or walking and still eating a ton of food. Some might think I’m joking, but I am definitely asking for a desk elliptical for Christmas this year.  I think it will give me a better quality of life LOL.

I’m already thinking about Halloween and trying to make plans in advance so that I don’t end up staying in again.  I always have the best costume put together, and the last couple of years I haven’t even worn it out.  Such a shame! I love Halloween and dressing up and making costumes…. I live for that shit.

This year’s inspo ^^^ I dressed up as MM once before and it was one of the years I didn’t end up going out.   This year, I’m going all out….come hell or high water.

Anyhow… here is my recipe for a “Thai-style” aka, white-people, bastardized-version of curry, made with butternut squash:


A couple of notes:

  • Be careful cutting the squash, they’re really firm and you risk the knife slipping out and towards you if you aren’t careful
  • This is kind of time consuming since the squash takes a full hour just to cook in the oven, so you may want to prep the sauce/squash a day before you assemble the actual curry….

INGREDIENTS:

A variety of veggies of your choice (below is what I used):

  • 1 medium-sized butternut squash
  • 1 green zucchini, chopped into bite-size chunks
  • 1 red pepper, cut into strips
  • 1 green (bell) pepper, cut into strips
  • 1 can of baby corn
  • 1 can of bamboo shoots
  • 1 package of extra-firm tofu, cubed
  • 1 small jar of red curry paste (Thai Kitchen brand is great and sold most places)
  • 1 can coconut milk
  • 1 box vegetable stock
  • 3 Tablespoons yellow curry powder
  • 1 Tablespoon turmeric
  • 2 tsp. granulated garlic
  • 1 tsp. cayenne pepper (more or less depending on desired level of spicy)
  • 1 tsp. red pepper flakes (more or less depending on desired level of spicy)
  • 1-2 limes (*the JUICE from 1-2 limes)
  • 1 bunch of fresh thai basil, or regular fresh basil
  • 2 Tablespoons fish sauce (*** OPTIONAL *** I’ve used in curries before, but I did not use in this one)
  • 3 cloves minced garlic
  • 2 Tablespoons vegetable oil
  • Cooked white rice to serve (Basmati or jasmine work best)

DIRECTIONS:

  1. Heat the oven to 400 degrees.
  2. Cut the butternut squash in half length-wise (*** please do this carefully – it cuts with difficulty and you risk slicing yourself or the knife coming out if you’re not careful); gut the seeds and stringy pulp out from the center of your squash by scooping it out with a spoon.
  3. Roast the squash at 400 degrees for 1 hour… test with a fork to see if tender:


IMG_3338
The finished squash… yours more take more or less time depending on the size.  Note the fork marks where I tested to see that it was soft enough to blend!

1.


IMG_3336
Behold: the raw butternut squash

A couple of notes:

  • Be careful cutting the squash, they’re really firm and you risk the knife slipping out and towards you if you aren’t careful
  • This is kind of time consuming since the squash takes a full hour just to cook in the oven, so you may want to prep the sauce/squash a day before you assemble the actual curry….

INGREDIENTS:

A variety of veggies of your choice (below is what I used):

  • 1 medium-sized butternut squash
  • 1 green zucchini, chopped into bite-size chunks
  • 1 red pepper, cut into strips
  • 1 green (bell) pepper, cut into strips
  • 1 can of baby corn
  • 1 can of bamboo shoots
  • 1 package of extra-firm tofu, cubed (OR… raw, peeled shrimp, OR…. sliced chicken breast, etc.)
  • 1 small jar of red curry paste (Thai Kitchen brand is great and sold most places)
  • 1 can coconut milk
  • 1 box vegetable stock
  • 3 Tablespoons yellow curry powder
  • 1 Tablespoon turmeric
  • 2 tsp. granulated garlic
  • 1 tsp. cayenne pepper (more or less depending on desired level of spicy)
  • 1 tsp. red pepper flakes (more or less depending on desired level of spicy)
  • 1-2 limes (*the JUICE from 1-2 limes)
  • 1 bunch of fresh thai basil, or regular fresh basil
  • 2 Tablespoons fish sauce (*** OPTIONAL *** I’ve used in curries before, but I did not use in this one)
  • 3 cloves minced garlic
  • 2 Tablespoons vegetable oil
  • Cooked white rice to serve (Basmati or jasmine work best)

IMG_3338
Your squash will need to roast 50-60 minutes depending on its size…. notice the fork marks where I tested to see that this was cooked through!

DIRECTIONS:

  1. Heat the oven to 400 degrees.
  2. Cut the butternut squash in half length-wise (*** please do this carefully – it cuts with difficulty and you risk slicing yourself or the knife coming out if you’re not careful); gut the seeds and stringy pulp out from the center of your squash by scooping it out with a spoon.
  3. Put the squash face-up on a roasting pan, and rub the face-up side with olive oil; roast the squash at 400 degrees for 1 hour… test with a fork to see if tender:
  4. Once the squash has cooled down enough to handle, use a spoon to scoop out the orange fleshy part into a blender or food processor.
  5. Add in about 2 cups of the veggie stock or enough liquid that blending will be possible (I know my blender has issues mixing everything if there isn’t enough liquid).
  6. Once you’ve blended the squash to a creamy and uniform texture, dump the mixture from the blender into a large saucepan or soup pan/pot and turn the burner to a low heat.
  7. Add in the entire jar of red curry paste and the entire can of coconut milk.
  8. Add in your spices (granulated garlic, turmeric, curry powder, red pepper, cayenne, etc.)
  9. You’ll most likely need to add more veggie stock at this point, as the curry will be way too thick.  My squash was huge, and therefore resulted in a lot of curry once it was blended…. the mixture was way too thick and I ended up adding the rest of my veggie stock.
  10. The curry sauce should be a nice, thick consistency, but still viscous in nature…. it should not be straight-up puree, nor should it be too soupy and watery.
  11. Add in the lime juice, the fish sauce (if you opted to use it), salt to taste, more pepper or seasoning as necessary, and some hand-shredded basil leaves (a nice handful).
  12. Remove the sauce from the heat and set aside or put in the fridge if you’re planning to use later.
  13. In a wok or large sauce pan, heat the vegetable oil over a low heat and get your fresh chopped veggies and minced garlic on deck (the canned veggies, like the corn and bamboo shoots, do NOT need to be sauteed with the raw veggies)
  14. You’ll want to sautee your veggies and garlic at a medium heat for only a few minutes, as they will finish cooking in the curry sauce and you DO NOT WANT THEM to be over cooked and soggy (gross).
  15. Once you’ve sauteed the veggies and garlic, add in the curry sauce and continue to cook over a low heat.
  16. This is the point where you can add in whatever canned veggies you’re using, like the baby corn and bamboo shoots, as well as the TOFU.
  17. Taste the sauce and add more seasoning to suit your tastes (you may want to make it hotter with more pepper, add a bit more salt, or a bit more lime juice for some zing).
  18. Serve over cooked rice and garnish with a bit of fresh basil!

IMG_3359
The curry sauce – the squash has been blended with liquid at this point, and simmering on the stove with the addition of all of the seasonings, paste, coconut milk, and more veggie stock… you might want to roast the squash/make the sauce a day in advance since it’s very time consuming

7AAC520A-A041-49DF-9BCA-145759CEED8F

This one was a hit… I will definitely be making this, or variations of this, throughout the coming colder months!  Apart from the coconut milk, it’s also pretty healthy 😀  Or, at least that’s what I told myself after eating half a wok….


Easter Dinner – A Meal to Impress

IMG_7560I am really happy right now because I found a pair of my favorite Hollister boyfriend-style, super-low rise jeans, in mint condition for only $10.   This is the only thing “giving me life” (as the kids nowadays like to say…) on a Monday evening.  What a fucking steal!

My favorite light-wash, destroyed boyfriend jeans from Hollister (*which I have had for the past 5 years), I have literally worn to pieces. They were already “destroyed” when I bought them, but now the holes that they came with are basically the entire length of the jeans, and I’ve worn them so much that they are loose around the waist because every thread of elastic has been worn out. It’s a miracle I was able to find the same pair again since they’re no longer carried in stores. Thank God for second-hand, online retailers! It’s the small things in life….

IMG_7277
Baggin’ Saggin’ Barry right here – I’ve had these babies since 2014 and now, even with a replacement, I still can’t bear to throw them out.  They’re like my second skin – I’ve worn them to so many concerts, bars, parties, and just have so many good memories in them. I think I’ll keep them forever…. they’re like my security blanket.

I didn’t go home for Easter this year.  I hate missing family holidays… especially now that my parents are getting older, I’m getting older, and I’ve realized I am not and they’re not as immortal as I once upon a time thought when I was in my early twenties. It’s hard to go home for a “weekend” when you’re not off on Friday or Monday however, and therefore would either have to request off one of the aforementioned days, or take public transit and then come home same day.  Easter is a holiday that falls on a Sunday every year – it doesn’t make sense to not be granted the following Monday after off, even if it’s a religious holiday – travel time people!

I made do given the circumstances and prepared a delicious meal for two.  I know most people have an Easter ham or some sort of roast, but since It was only the two of us, and I’m still trying to refrain from eating land animals (***there have been a few slip ups when intoxicated) I decided to make seafood instead.  I’ve realized that everything looks fancier when it’s served over a puree or sauce, so in order to make this meal special for the holiday, I decided to make a split-pea puree to accompany the scallops.  I also made mussels in a white wine sauce, and a salad for some greens/fiber.

This is a meal to cook if you want to impress someone – whether it’s a significant other, your mother, your father, a good friend, or someone you really care about and generally just want to treat well.  It not only tastes fucking amazing, but it’s also a filling meal, which I find important, and the presentation is what makes it especially impressive when served in the comforts of your own home.

FOR THE SPLIT-PEA PUREE

INGREDIENTS:

  • 1 cup of dried split-peas
  • 1 stalk of celery, finely diced
  • 1 small Idaho or white potato (peeled and cut into cubes)
  • 4 cloves of garlic, peeled and finely minced
  • 3 cups chicken stock
  • 3 Tbs olive oil
  • 1/2 cup frozen, green peas
  • sprinkle of cayenne pepper
  • salt and pepper to taste
  • 4 Tbs. heavy cream

IMG_7505

DIRECTIONS:

  • Heat the olive oil over low-heat in a saucepan/small pot
  • Add in the minced garlic and cook over low heat for about a minute and a half
  • add in the celery, split peas, cubed potato, and the stock and raise the heat to medium-high
  • bring to a boil and cook until the peas and the potato are tender (you’ll need to taste test)
  • Add in the frozen peas and cook for another minute
  • at this point, most of the liquid should be absorbed, but not all of it! Some liquid is important for the process of blending… but you’ll be able to add more as necessaryIMG_7507
  • Once the peas are soft and the potato is cooked through, turn off the heat and let cool for a few minutes
  • Place contents of the pot into a blender, along with a dash of cayenne pepper and some salt and pepper

IMG_7508
Cooked mixture in the blender (pre-blending)

  • Blend on low-medium setting, until the consistency becomes thick and uniform
  • Add some heavy cream and/or more chicken stock as necessary (you’ll probably need a bit more liquid)
  • Make sure to taste-test to determine whether more salt, pepper, or cayenne pepper is needed
  • Puree should end up being a smooth, thick consistency

IMG_7514
Perfect consistency here… add more liquid as necessary

  • Set aside while you prepare the scallops and mussels
  • Please note:  I suggest doing the mussels and salad next and saving the scallops for last, since you’ll want to serve them hot.

FOR THE SALAD

  • I went basic AF for the salad here, so it’s pretty much just pure roughage
  • I used: Arugula, alfalfa sprouts, and grape tomatoes
  • For the dressing: 1/3 cup mayo, 1/3 cup Parmesan cheese, juice from one lemon, 1 Tbs. olive oil, 3 tsp. white vinegar, freshly ground black pepper – whisk together in small bowl and voila!

IMG_7528
Homemade salad dressing makes all the difference – if you have an aversion to mayo or want to be healthier, I’d suggest just using olive oil, a spritz of fresh lemon juice, and then sprinkle with salt and pepper, and/or some balsamic vinegar

FOR THE MUSSELS

INGREDIENTS:

  • 1 finely minced shallot
  • 2 dried or fresh bay leaves
  • 2 Tbs. olive oil
  • 3 Tbs. butter
  • 3 cloves of finely minced garlic
  • 1 lb. (1 bag) of fresh mussels
  • 1 tsp. red pepper flakes
  • 1 tsp. thyme (dried or freshly chopped)
  • juice from one lemon
  • 1 cup white wine
  • 1/2 cup heavy cream
  • salt/pepper to taste
  • 1 Tbs. freshly chopped parsley
  • Toast to serve (tastes like heaven dipped in the mussel sauce!)

IMG_7523

DIRECTIONS:

  • In a wok or large sauce pan, heat the olive oil over low heat
  • Add in the minced shallots and cook for 2 minutes, stirring occasionally
  • Add in the minced garlic and cook for another minute
  • Add in the bay leaves, red pepper flakes, and butter and cook for another minute
  • Add in the mussels and increase the heat to low-medium
  • As soon as you’ve added the mussels and turned up the heat, add in the wine!
  • Add in the fresh lemon juice
  • Cover with a lid and wait about 2 minutes or so, until you see the mussel shells opening
  • Add in the cream and fresh parsley and give a good stir
  • Add in some pepper and salt and give another good stir
  • Once mussels seem pretty opened, turn off burner and remove from heat – set aside

IMG_7526

IMG_7534 (1)
Hell yeah – the toast dipped in that sauce is heaven on Earth

FOR THE SCALLOPS

INGREDIENTS:

  • 1 lb. fresh sea scallops (patted dry with paper towels… they MUST BE DRY to cook, excess moisture means they won’t brown at all)
  • 3 cloves finely minced garlic
  • 2 Tbs. butter
  • Salt and pepper
  • 2 Tbs. freshly squeezed lemon juice
  • 3 Tbs. white wine
  • Split-pea puree
  • sprinkling of alfalfa sprouts

DIRECTIONS:

  • Pat the scallops dry with paper towels
  • Salt and pepper the scallops on both sides
  • Heat butter in a shallow, saucepan over low heat
  • Add in the garlic and cook over low heat for about 1 minute
  • Add in the scallops and increase the heat to low-medium
  • Cook for 2 minutes on each side (approximately 4 minutes in total)
  • sprinkle with lemon juice and white wine, lower heat and cook for another 30 seconds
  • remove from heat
  • re-heat the split pea puree (microwave or stove top)
  • Plate the split pea puree, and plate the scallops with sauce
  • Garnish with alfalfa sprouts and serve hot

IMG_7538
Perfection

And now I am hungry again sitting here writing about this meal… that’s how good it was!

I also did some painting this weekend:

IMG_7561
This one took a surprisingly happy turn, what with the yellow flowers and bright background… still not finished though

Tuna (the new kitten) is coming home this next weekend, and I think Mr. Peeper can sense that he’s about to no longer be the only child because he has been extra lovely:

IMG_7475

404CBE25-927A-46DC-BBA1-3AEF799CB553
Took Peeps for a nice, long stroller on Easter morning.

Cheers.


We Eat Because We Are Emo, and We are Emo Because We Eat: Vegan BALLZ and Anger Issues

IMG_6568
A joyous week indeed… disdain, chest-ne, bac-ne, LIFE IS GOOD! 

Before we get into the food talk, I have to have a brief rant (actually, two, brief rants):  I’m getting a second cat, and apparently no one in my family supports that decision.  I’m not sure why, considering I’m a more responsible pet owner than anyone else I’ve EVER known.  I’m under the impression that they think that I’m going to become a cat lady or something.  Like, that’s NEVER gonna happen, guys.  First off, I’m far too vain and concerned with outward appearances to ever let myself go (i.e. becoming morbidly obese with bad teeth and wearing purple tracksuits) and/or to walk around smelling like cat piss whilst wearing a sweatshirt that’s embroidered with cats.

Secondly, I would never become a cat hoarder, nor would I ever even consider owning more than two cats, MAX,  at any given time – not even if I had a huge house and a yard and it was an actual possibility.   I don’t think I’ve exhibited any “cat lady” signs that should make them worry that that’s the road I’m headed down either.  My apartment is fucking immaculately clean, I have plenty of friends with whom I socialize with on a weekly basis, and I am in a long-term, stable relationship. Like WTF?  I’ve also been lectured: “what about when you have real kids?  What if your kid is allergic, or you don’t have time for the pets?” To this I say (1) Every other degenerate parent I know that already had pets when they had a baby seemed to make it work, (2) I would probably give away a kid that I’ve only had for two weeks before a pet that I’ve had for 5 years, and (3) my cat is already more high maintenance than a bald baby who sleeps 18 hours a day will ever be, so I’d still have plenty of time to care for him (them).

I am also the best cat-parent I know.  Like, honestly, who else spends two hours a day brushing their cat, pampering him and playing with him – even on the nights I come home dog tired from working late? One of the major reasons I’m getting a second cat is because I want Mr. Peeper to have a friend and playmate to keep him company during the afternoon.  Not that I’m not home EVERY.SINGLE.NIGHT and make it a point to stay home when I can on weekends just to be with him.  Most cat owners I know think that because they have cats and not dogs, they can leave their cat(s) unattended for an entire weekend or longer.   I have never left my cat alone for more than a 12-hour stretch and I never would, because I think that’s being a negligent pet owner.   I’m so fired up right now…. You’d think I just told them I’d eloped with a carnie I had known for only 24-hours in Vegas ,or like, quit my job and was moving to Puerto Rico with a circus worker.

It’s also not like I’m having a kid anytime soon (or possibly ever, at this rate), so why not get a second pet?!  Anyhow, this is Simón Pier Tuna… a.k.a TUNA:

img_6579.png
Meet Tuna! He will be coming home to join the family at the end of April!

Sorry everyone, I have to keep ranting, because it’s MY FOOD blog, and I’ll rant about whatever I want, even if it’s non-food related.

ANOTHER RANT (*VERY WOMANLY RANT AHEAD* – You’ve been warned if you’re a guy):

I love being a woman, mainly because I like wearing makeup and heels without judgment, and also because I can’t imagine myself being a man.  Despite all of the advantages of being a woman (who am I kidding – WHAT advantages? Discrimination in the workplace? The expectation that you’ll handle all of the domestic duties on top of full-time work? LOL), there are also many disadvantages. There are times when being a woman sucks. Also, the state of healthcare and coverage in this country sucks hard on any-given-day.  The United States is essentially the only developed nation WITHOUT universal healthcare… and that blows exponentially.   Like, even with insurance, the healthcare in this country SUCKS.   I already have an extremely high deductible given my annual salary – my deductible is 4.6% of my annual salary.  For those of you in countries with universal healthcare, a ‘deductible’ is the amount of money you must pay out-of-pocket before insurance even kicks in to cover any percentage at all of your medical bills… yeah, it’s confusing.  It took me until this year to fully understand how deductibles actually work (or, should I say, DON’T work).

Anyhow, when my insurance switched over to my new job in January, the birth control I have been on for the last 8 years of my life was no longer covered.  It had been 100% covered (FREE) with my last insurance.  In my opinion, all birth control should be free – it’s preventative care and could save insurance companies tons of money in the long run. Anyhow, I digress…. with my new insurance, for the SAME birth control medication, I would end up having to pay $500 out of pocket every 3 months.  Guys, this is the cost of my medication WITH INSURANCE.  WTF? ! It took me three different birth controls to find one that actually met my needs and didn’t completely fuck my body up when I started taking this pill 8 years ago.  I tried three other pills before I ended up with this one, and each one had terrible effects ranging from weight-gain, Dolly Parton-sized breasts, nausea, headaches, etc..   I know this sounds like some “Alice in Wonderland” magic mushroom shit (one makes you tall, one makes you small), but I’m serious. This is the only one that worked for me, without terrible effects.

I called my doctor as soon as I found out my normal medication wasn’t covered, and decided tried another one that WAS fully covered by my new insurance, which the doctor assured me was similar, and I gained 5 lbs. on the 3 days I was on it, and cried over everything for no reason.  At that point, I just threw all three months work of it away and said ‘f*ck it.’  I am too old to deal with this shizzle.  I have no intent of having a kid either, if anyone is wondering. I’m just also not dealing with unnecessary weight gain and mood swings at this point in my life.

I just can’t keep playing Goldilocks and trying to find the perfect size chair or the right temperature porridge at this age, you know?  I knew what actually worked for my body, and it’s been taken away due to America’s fabulous healthcare coverage.  Anyhow, I was feeling confident and happy in my decision to be rid of hormonal contraceptives, since I know that they aren’t that great for you in the long run.  Now, my skin is going haywire and I’m like psychotic.   I’m breaking out all over my body – my chest, my back, my jawline, my neck… like WTF?!  Is there no winning in this world?! Also, I’ve been way more emotional in the last two months than I have been in the last 8 years. I am not OK with this.  I don’t know what else to do except to ride it out or order the only other pill that has the same ingredients my old one did, which is only available in Europe.

Anyhow.  I’m done bitching.

I made some awesome vegan, ‘meatless’ ballz for a potluck work party I had this week.  We have a couple of vegans/vegetarians in the office, so I figured I would just make something everyone could enjoy instead of making both vegan and meat.

IMG_6556
These are similar to the vegetarian ballz featured in an earlier blog post, but totally free from animal products

INGREDIENTS:

  • 2 cups of cooked quinoa (white, red, mixed, any color quinoa is good)
  • 2 cans of black beans
  • 1/2 white or yellow onion, finely diced
  • 4 cloves of garlic, finely diced
  • 1 small can of tomato paste
  • 1 cup Mozzarella-vegan (soy-based) ‘cheese’ (can’t really call this shiz cheese …)
  • 2 Tbs. soy sauce
  • 3 Tbs. Olive oil
  • 1 Tbs. freshly chopped parsley
  • 1 Tbs. freshly chopped basil
  • 1 tsp. red pepper flakes
  • 4 cups vegetable stock
  • Salt/pepper/granulated garlic to taste

DIRECTIONS:

  • THIS FIRST STEP YOU CAN DO A DAY OR TWO IN ADVANCE:
  • Cook 1 cup dried quinoa in about 3 cups vegetable stock – add more stock or water as necessary, until all water is gone and quinoa is cooked through, and light and fluffy
  • Once the quinoa is cooked, set aside to cool or until ready to use

IMG_6543

IMG_6545

  • Pre-heat the oven to 350 degrees F.
  • Drain and rinse the 2 cans of black beans and lay out onto a baking sheet to dry and go into the over
  • Put the tray of beans into the oven for approximately 20 minutes, until they are dry and begin to crack on the outside
  • While the beans are in the over, chop your onion, garlic, and fresh herbs

IMG_6553

IMG_6544 (1)
This is what your black beans should look like when they come out of the oven

  • In a small saucepan, saute the onion and garlic over low heat, until cooked-through (add the onion first and cook until translucent, and then the garlic last and cook for another couple of minutes) – set aside once cooked.

IMG_6548

  • In a blender, pulse the fake mozzarella cheese until it is crumbly
  • Next, add in the dried black beans into the blender along with the olive oil, and pulse until crumbly
  • Dump this mixture into a large mixing bowl
  • Add in your cooked onion/garlic mixture
  • Add in the cooked quinoa
  • Add in the seasonings (chopped basil, chopped parsley, salt/pepper, dried pepper flakes, dried oregano, granulated garlic, soy sauce)
  • Add in 3-4 Tbs. of the tomato paste
  • Mix everything together with your hands

IMG_6550
Everything added together and partially mixed – I threw in more tomato paste because it needed more moisture! The great thing about making ‘meatless’ balls, is that you can taste test as necessary without worrying about salmonella!!! Taste away!

IMG_6555
In-motion shot from my IG story… sorry!  Once the mixture is a good texture (i.e. holds together when you roll it, but not too dry), you will roll into meatball sized balls 

  • Roll the mixture into golf-ball sized balls once it is the right consistency and flavor
  • Place the balls on a baking sheet or in an oven-safe dish to bake; cook for 30 minutes or so
  • You may have to rotate the balls half-way through cooking, to ensure even cooking on all sides
  • Serve with your favorite tomato sauce, alone, or over pasta!

DC7D8958-4D5C-4C42-82A1-8BCF74ED6FFE
Not as good as turkey… but I’m a heathen by nature and it’s hard to change my tastes

After I slaved away making these balls, I worked a 10 hour day and came home to make myself some ratchet ramen:

57482520828__689FA599-ECDA-46CA-BD94-DEA2FA1E3546
Now we’re talking … 

Once again I basically haven’t slept all week.  Today I let my alarm go off at 8 minute intervals over the course of 1.5 hours…. who does that?  For the amount of time I continued to have interrupted sleep, I could have just re-set the alarm another hour out and gotten some solid sleep.

I cannot wait to sleep this weekend. What’s new? Oh well… what do you expect from a future cat lady?